


If you spend enough time hiking, you eventually reach for a compass. And not just any compass — a baseplate compass. They’re the go-to tool for British hikers and hillwalkers because they’re affordable, tough, and designed to work seamlessly with OS Explorer maps. With a bit of practice, a baseplate compass quickly shows you the direction you’re facing, the line you need to follow, and how to stay on course—no signal, no battery, no guesswork.
This guide breaks down the anatomy and purpose of every single part of a baseplate compass. You’ll understand what every line, arrow, and marking actually does—not in a textbook way, but in the moments that matter, like picking your way up Helvellyn in thick fog and needing absolute clarity. It’s not a full “how-to” tutorial (you’ll find that in my How to Use a Compass for Hiking in the UK guide); instead, it’s your quick-reference resource to identify every feature and understand its crucial role in safe UK hiking and hillwalking.
Why the Baseplate Compass Rules the Hills and Trails
-
Ease of use: The transparent baseplate lays directly over your OS map so you can see the detail beneath while lining up bearings.
-
Availability: Brands like Silva and Suunto dominate UK shelves, but most outdoor retailers — from Cotswold Outdoor to Mountain Warehouse — sell their own near-identical versions.
-
Reliability: No batteries, no calibration, no signal, no excuses. Drop one, wipe it off, keep going.
-
Compatibility: The Rulers and Romer scales match OS map scales exactly. Essential for UK navigation.
1 — Baseplate (Transparent Body)
The clear plastic foundation for laying the compass over your OS map.
The baseplate is the clear plastic sheet that everything else is mounted on. It’s what allows you to lay the compass directly over your map without hiding contour lines, paths or grid numbers. The long, straight baseplate gives you more accuracy when aligning two points. Some even include small cut-outs for drawing circles or marking waypoints directly on your map. Treat it gently — scratches and dirt make fine alignment harder.

2 — Straight Edges
The sides used as rulers and for drawing lines between map points.
Each long side of the baseplate serves as your ruler and alignment aid. When plotting a route or transferring a bearing, you use these edges to draw a line between two map points. The longer the edge, the less angular error you introduce. Seasoned navigators often choose larger baseplates for this reason.
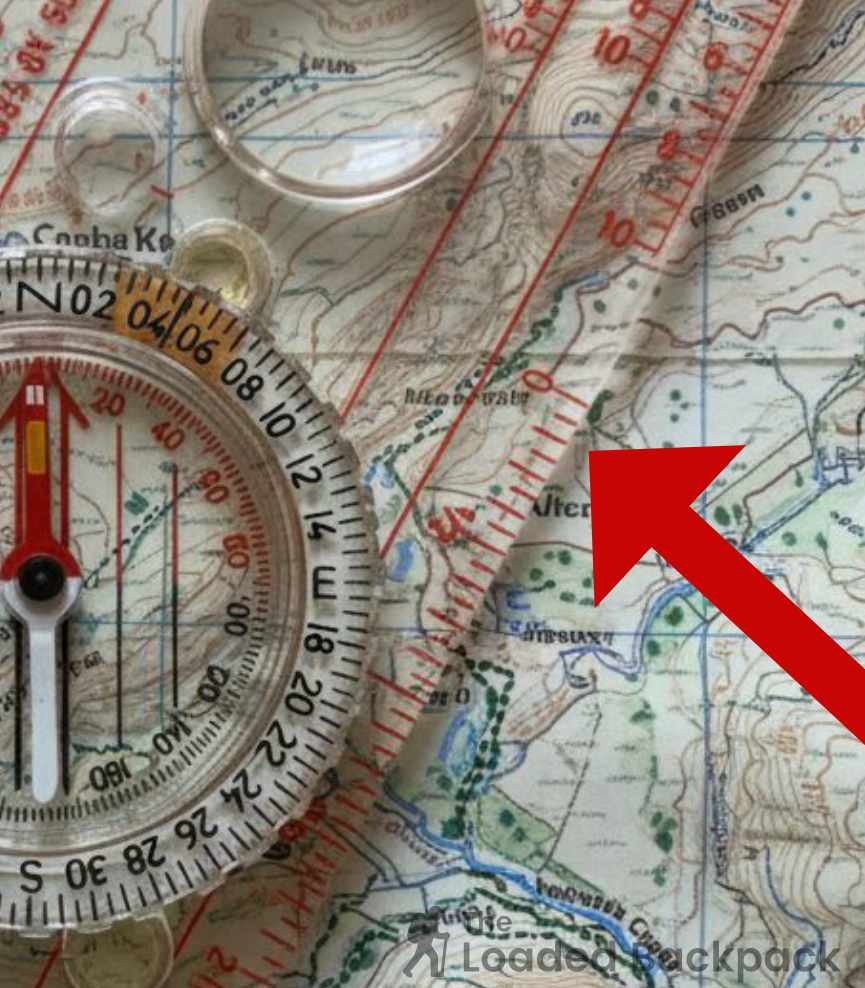
3 — Rulers (Millimetres, Centimetres, and Inches)
Scales for measuring distance on your map based on its ratio.
Most baseplate compasses have dual metric and imperial rulers. The mm/cm side lets you measure distances on 1:25,000 and 1:50,000 maps; the inch scale can help estimate miles using the conversion on the map’s scale bar (roughly 1 inch = 0.4 miles at 1:25k). Handy for quick leg estimates: measure, multiply, and you’ve got a ballpark distance for timing and pacing.

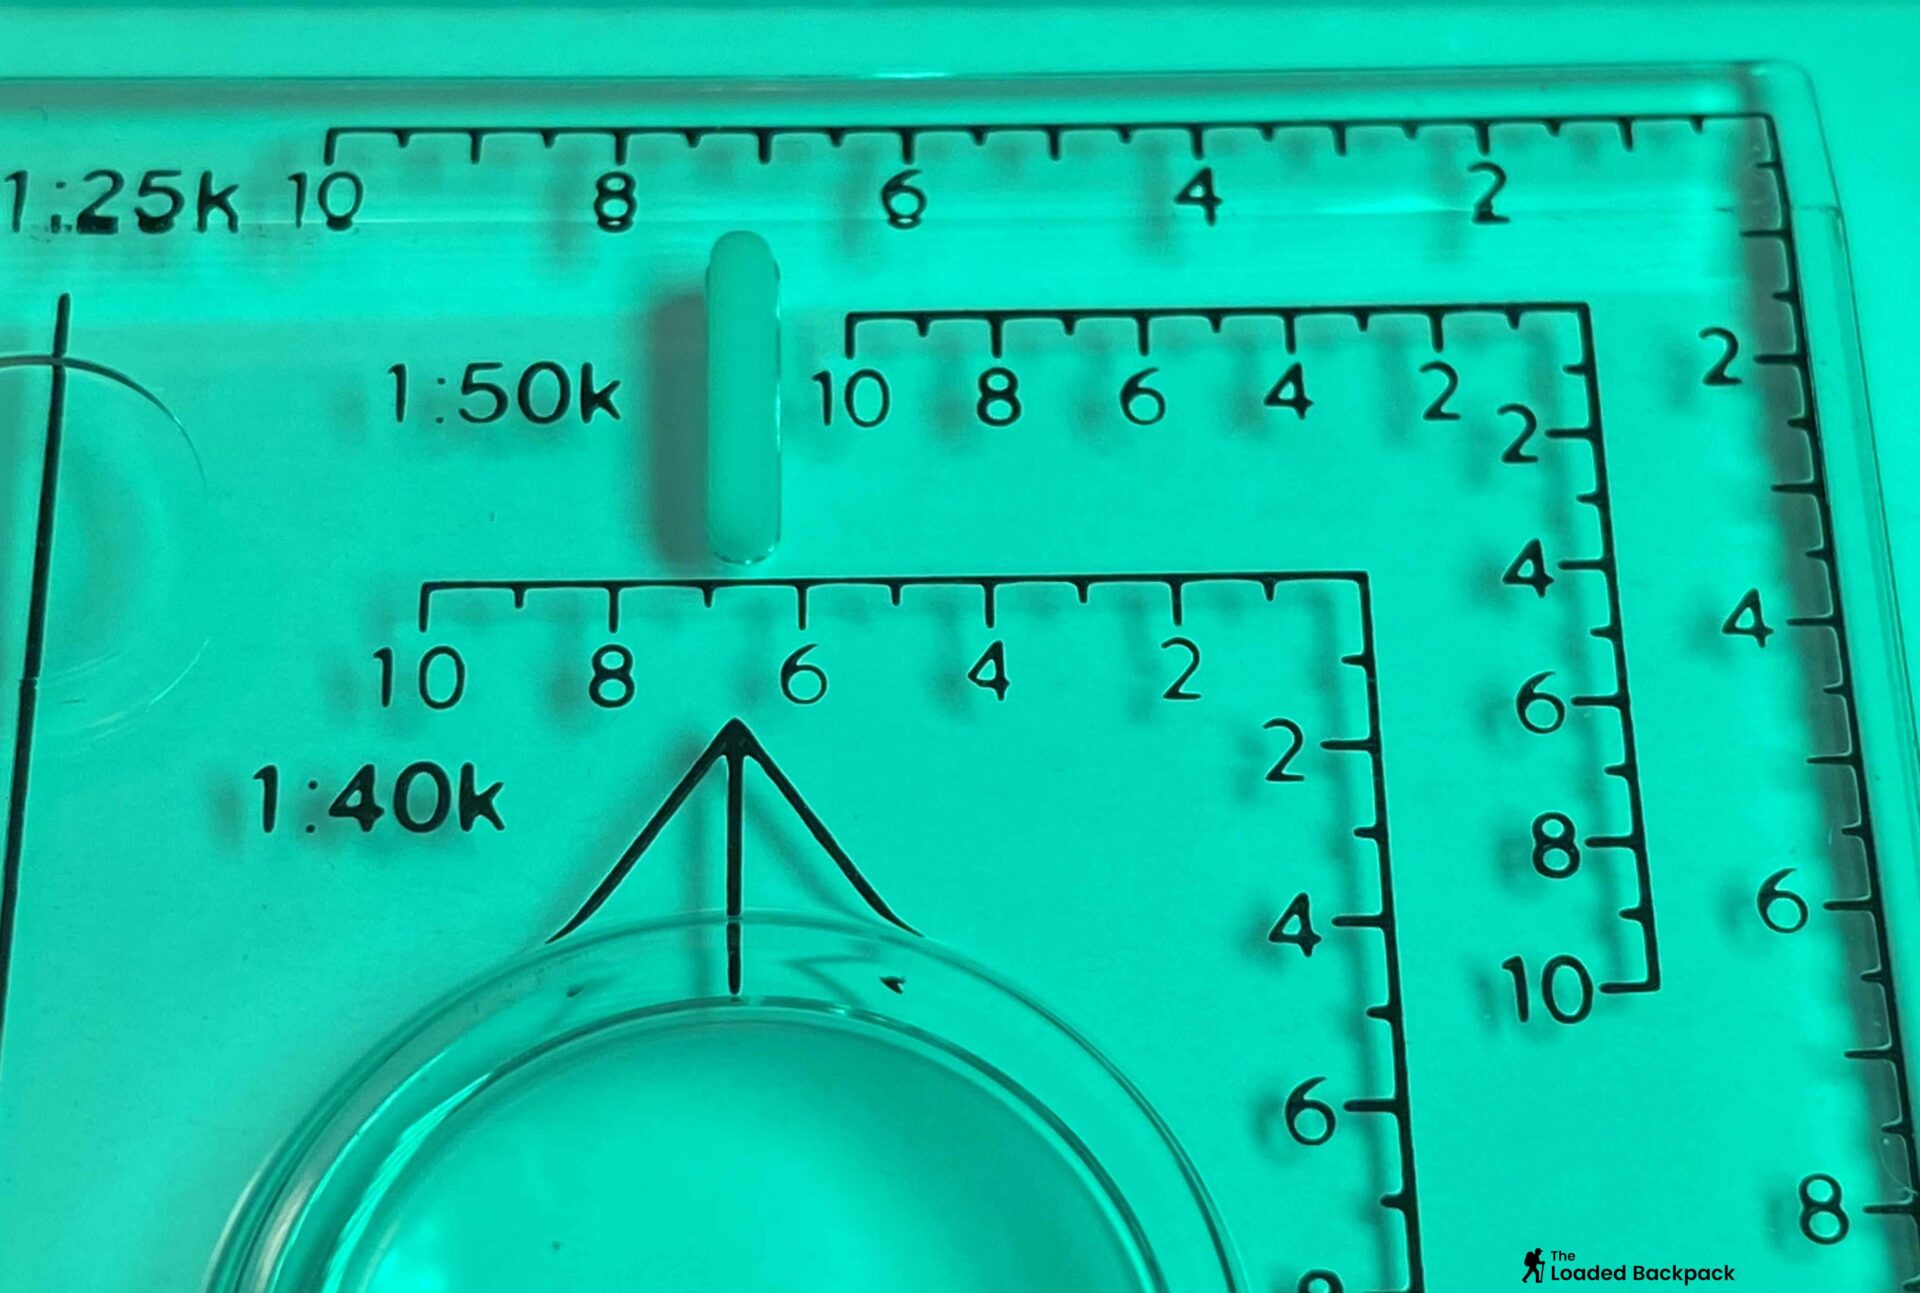
4 — Romer Scales (Grid Reference Tool)
The grid scales used to pinpoint an exact six-figure OS grid reference.
Romer scales are small numbered grids labelled 1:25k, 1:50k, and sometimes 1:40k imprinted on the baseplate. Use them to measure distance or to accurately pinpoint an exact six-figure OS grid reference without guesswork. Line the zero on a Romer corner with the grid line, slide until it touches your feature, then read the numbers for an instant six-figure grid ref. Once you’ve used one, you’ll never go back to “eyeballing it.”
5 — Direction-of-Travel Arrow
The arrow on the baseplate showing the exact direction you must walk.
This big arrow printed on the baseplate tells you which way to face when following a bearing. Once your bearing is set, you turn until the magnetic needle sits in the orienting arrow, then walk in the direction this arrow points. Keep it pointing forward — never sideways or back at yourself. Think of it as the compass saying, ‘Go this way, mate.’

6 — Rotating Bezel (Compass Housing)
The numbered ring that rotates to set or read your precise bearing.
The bezel, or compass housing, is the rotating ring with degree markings from 0° to 360°. Turn it to set or read a bearing. Inside the housing you’ll also see Orienting Lines (9) and an Orienting Arrow (10) — we’ll come to those shortly. A smooth, firm rotation (neither loose nor stiff) is crucial. Cheap copies often spin too freely and won’t hold a bearing in rough conditions. Stick with reliable makes like Silva or Suunto; you’ll feel the difference in quality.
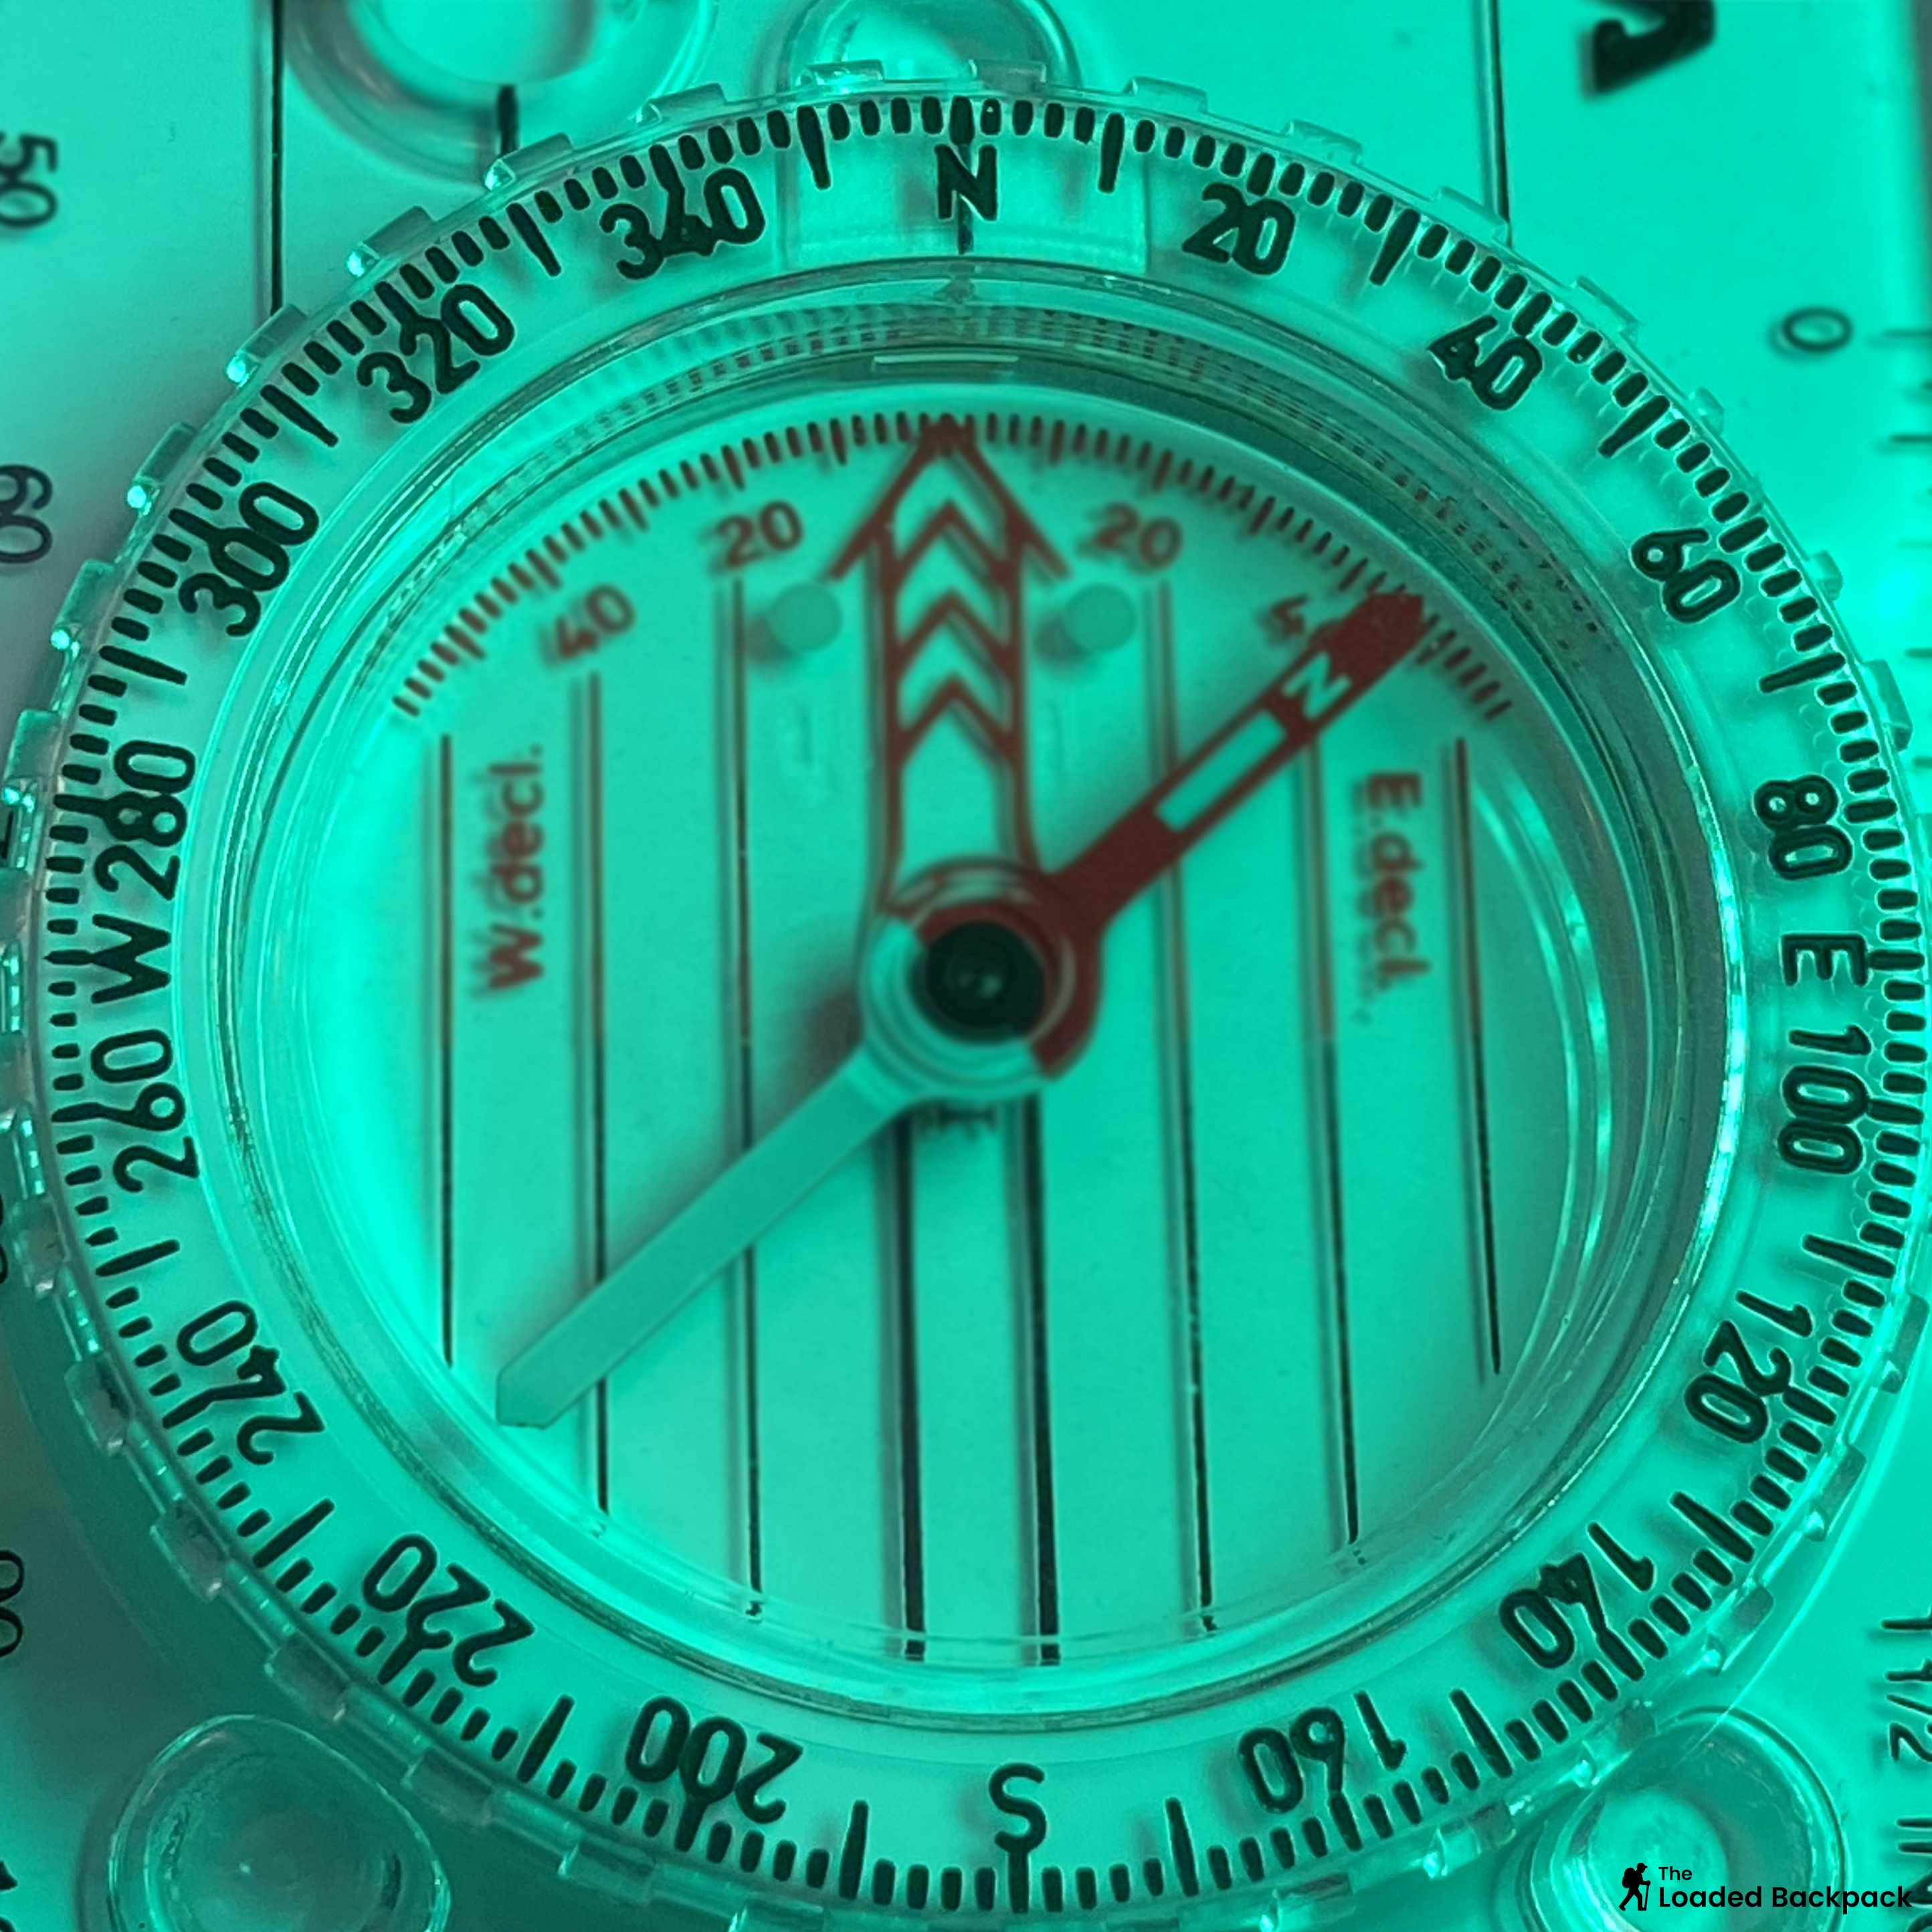
7 — Degree Graduations (0 – 360°)
The full circular scale used to measure direction in degrees.
Around the bezel you’ll find numbers marking the full circle of the horizon, usually in 2° or 5° increments. This lets you measure direction precisely in degrees going clockwise from north — 0° is north, 90° east, 180° south and 270° west. When you rotate the bezel to match your intended direction, you’ll read the value at the index line (8). Accuracy matters: even 2° of error can push you tens of metres off-course over a kilometre.
👉 Expert note: Some advanced models mark using 6400 mils, a military angular unit, but for hillwalking you’ll almost always use degrees.

8 — Index Line (Bearing Read Line)
The fixed mark on the housing where you read the set bearing value.
The index line is a fine red or black mark on the housing — where you read your chosen bearing once the bezel is turned. Think of it as your ‘reading window’. Every other mark on the compass moves, but this line stays fixed, ensuring you always read the correct figure. Beginners sometimes read from the wrong place on the bezel, which instantly adds many degrees of error. Always double-check you’re reading at the index, not off to the side.

9 — Orienting Lines (Meridian Lines)
The parallel lines inside the bezel used to align the compass to the map’s grid.
These thin parallel lines inside the bezel are your secret weapon for accuracy. When you place the compass on the map, rotate the bezel until these lines run exactly parallel to the blue north–south grid lines. This ensures your compass housing (6) — and therefore your bearing — matches the map’s orientation. If you rush this step or align to the wrong set of grid squares, your bearing will be off even before you leave the map.
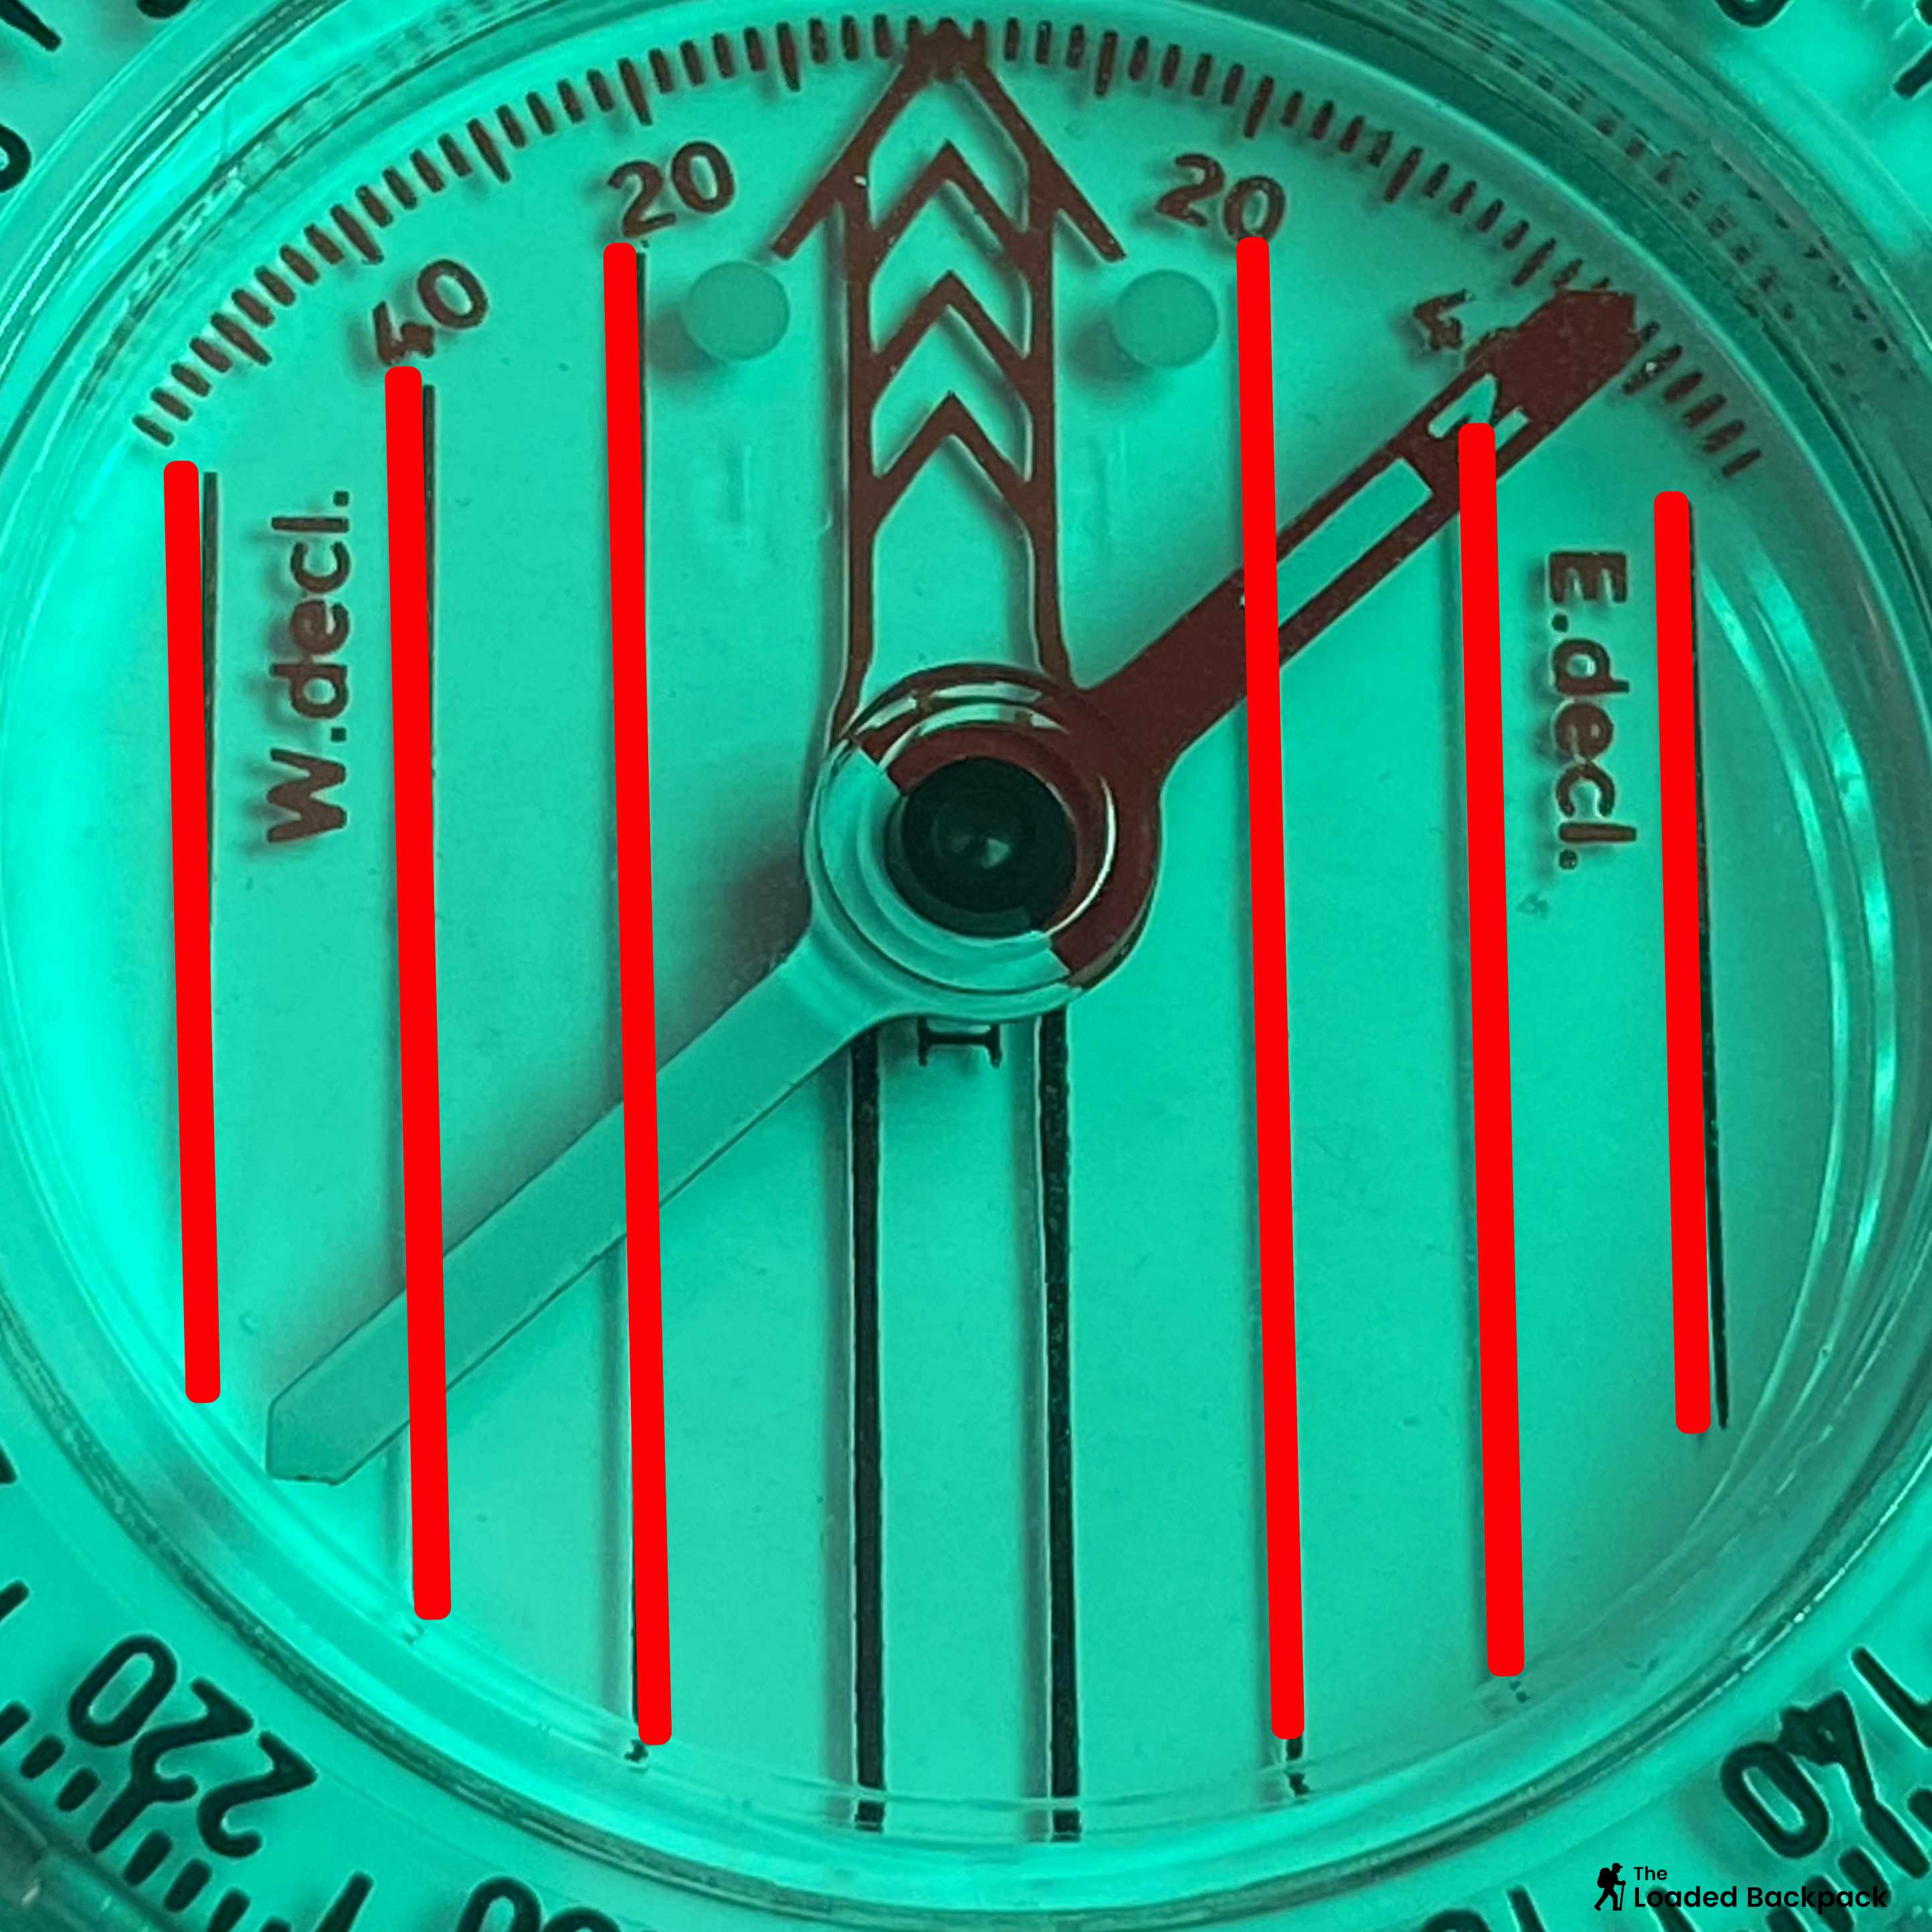
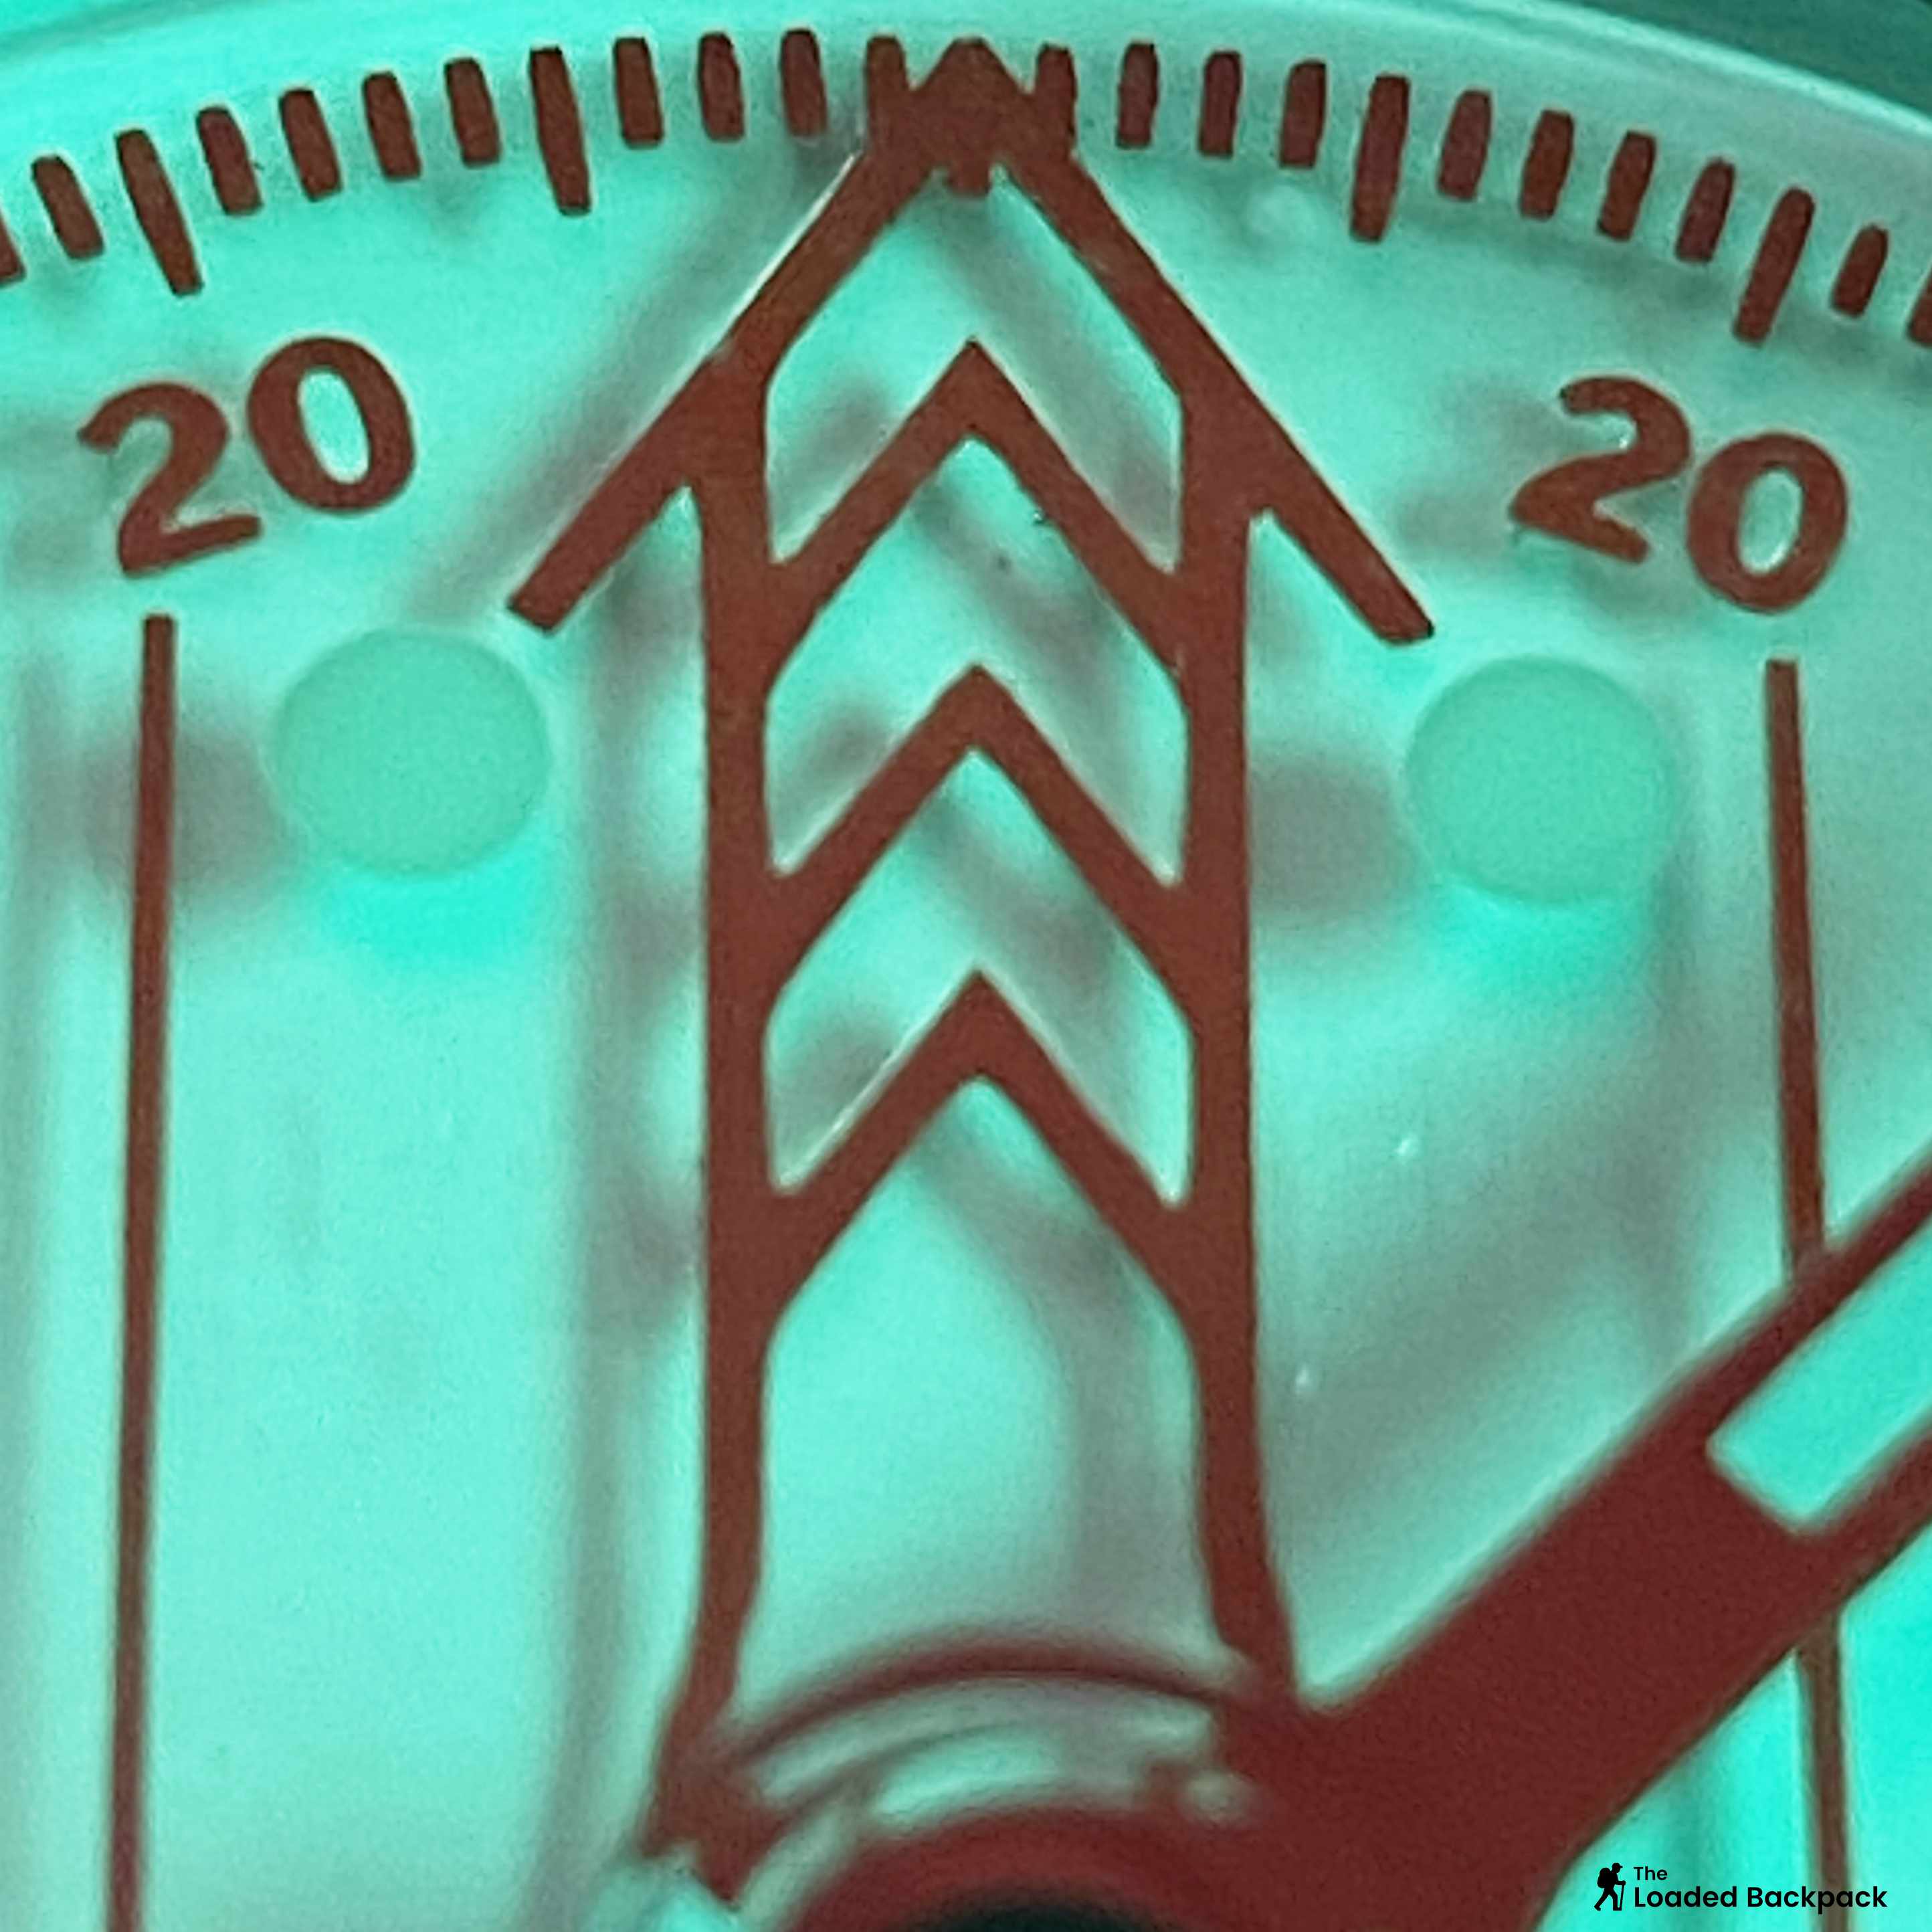
10 — Orienting Arrow (“The Shed”)
The red outline inside the bezel where the magnetic needle sits when walking.
Inside the housing sits a bold red outline arrow — the orienting arrow. Once your bearing is set and you’re ready to walk, you rotate your body until the magnetic needle (11) sits neatly inside this arrow — that’s the famous “red in the shed” phrase you’ll hear on every navigation course. Keep red in the shed while you walk, and you’ll stay on course. Let it drift, and you’re wandering off line.
11 — Magnetic Needle (Red = North)
The free-floating, magnetised needle that always points toward Magnetic North.
The needle is the only moving part that matters: one end painted red to point toward magnetic north. It floats in liquid so it settles quickly without jittering. Never store the compass near magnets, phone speakers or GPS units — they can permanently skew or reverse polarity. Keep it flat when in use; a tilted needle rubs on the capsule roof and sticks. If you ever notice sluggish movement or inconsistent north, it’s time for a new compass.

12 — Liquid-Filled Capsule
The sealed housing containing damping fluid to stabilise the magnetic needle.
The circular capsule surrounding the needle is filled with clear damping liquid (usually mineral oil). This stops the needle vibrating wildly, especially in wind or when you’re on the move and ensures stability and accuracy of the needle. Occasionally, a tiny bubble can appear from temperature changes — no problem — but a large, growing bubble means a leak or heat damage. Avoid leaving your compass on a car dashboard or inside a tent pocket in summer. A well-sealed capsule lasts decades; a cheap one can fail in a single hot day.

13 — Cardinal Markings (N / E / S / W)
Simple reference letters for North, East, South, and West for quick orientation checks.
Around the housing you’ll usually see the four main compass points. They’re simple reference cues for quick orientation — a glance tells you whether the bezel you’ve set roughly matches the direction you think you’re facing. When teaching beginners, this is the easiest way to sanity-check: if you’ve set a bearing that’s supposed to head east but the “E” is pointing behind you, something’s wrong.

14 — Declination Scale / Adjustment
An optional feature used to correct for the difference between Grid North and Magnetic North.
Some compasses include a small diagram or screw that lets you compensate for magnetic variation — the angle between map grid north (true north) and magnetic north. In the UK this offset is very small (usually less than 1°) and can essentially be ignored, but it does change slowly over time. On an adjustable model, you set that correction once and forget about it; on simpler ones, you just add or subtract mentally when taking a bearing from map to ground.

15 — Lanyard & Attachment Point
The cord and loop used to securely tether the compass to your body or pack.
A small loop at one end lets you attach a cord so the compass can hang from your neck or wrist. This sounds trivial until you fumble your map in 40 mph wind. Keep it long enough to use comfortably without unclipping. Some hikers tie in a quick-release knot or add a small carabiner to clip onto pack straps. Losing a compass mid-walk is rare — but only because generally people tether them properly.
16 — Magnifier (Lens Window)
A small lens on the baseplate for reading fine contour detail and map symbols without lifting the map.
Many baseplates include a small magnifying lens for reading dense map symbols or tight contour clusters. It’s surprisingly useful if your eyesight dips in low light or drizzle. Press the lens flat to the map to avoid distortion; the extra magnification helps you tell crag from scree without reaching for reading glasses.

17 — Friction Feet (Grip Pads)
The rubber pads or markings that help prevent the compass from sliding on the map.
On the underside you’ll spot 3 tiny rubber dots: these stop the compass skating over wet map plastic. Higher-end models add parallax lines (18) –a line to use between two map points.
18 — Parallax Lines (Sighting Aids)
Fine lines on the baseplate used to eliminate sighting error when taking a precise bearing.
Found on higher-end models, parallax lines are thin, often mirrored lines printed beneath the sighting line or straight edge. Their purpose is simple but vital for accuracy: when you sight a distant landmark (like a peak or radio mast), you look down and align the object with the main sighting line and the parallax line. This alignment ensures your eye is directly over the compass, eliminating the angular sighting error that occurs if you look at the needle from an angle (called parallax error).
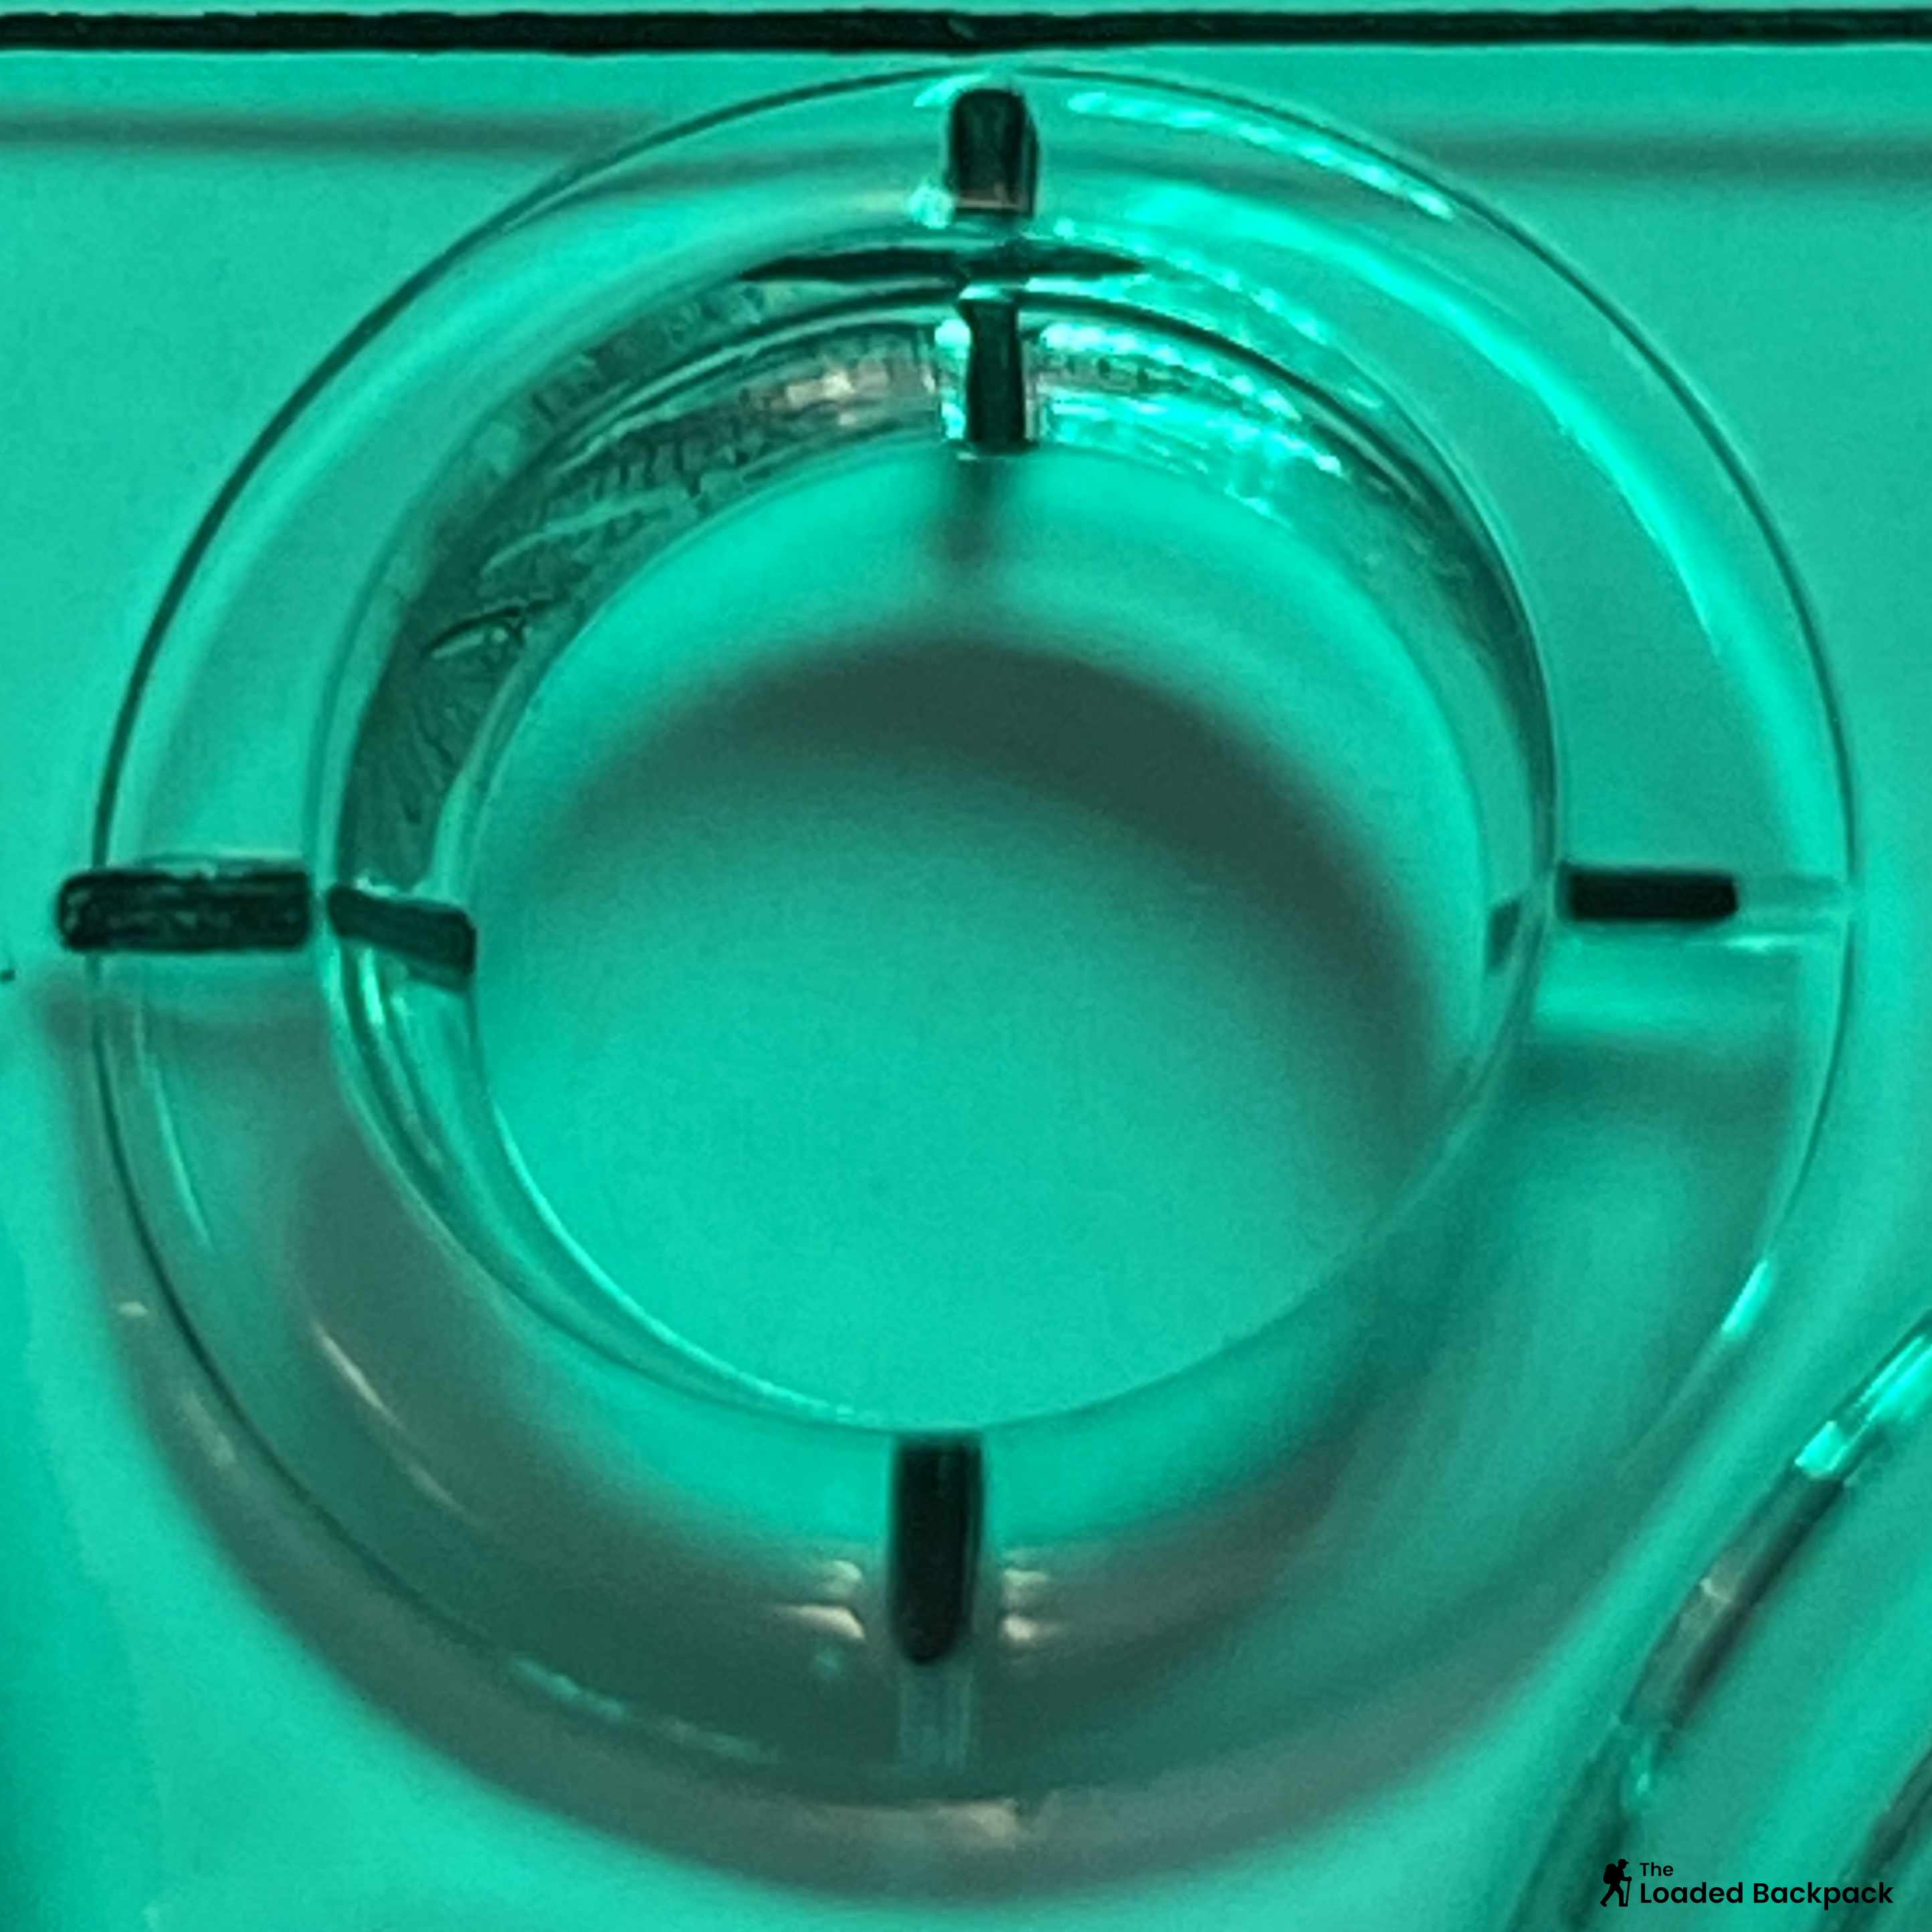
19 — Cut-Outs (Map Marking Aids)
Small template holes used for drawing circles, route marks, or plotting GPS error zones.
Cut-outs are small holes or shapes in the baseplate that allow you to quickly mark your map without lifting the compass. The most common are small circles for drawing waypoints or a simple corner cut-out for marking a route leg. More advanced compasses, especially those aimed at Search and Rescue or ultra-precision work, include a series of circular cut-outs calibrated for use with OS maps. These are typically labelled in metres (e.g., , ) and are used alongside GPS devices to accurately draw your potential error zone on the map.
20 — Tritium & Luminous Markers (Night Use)
The painted or powered markers that allow the needle and bezel to be read in complete darkness.
Essential for night navigation, most hiking compasses use luminous paint—it ‘charges’ under daylight or a headtorch and glows for a short period. Conversely, Tritium is a low-level radioactive isotope used in military-grade compasses to provide a non-stop, permanent glow without recharging. If you own a tritium compass, you will notice the mandatory radiation warning sticker on the baseplate. For almost all UK hillwalking needs, the glow paint version is more than sufficient and carries no safety concerns.

Azimuth vs Bearing — the Quick Difference
You’ll sometimes see “azimuth” used instead of “bearing,” which can be confusing. They both describe an angle measured clockwise from north. The only difference is usage: azimuth is the absolute direction (e.g. an object lies at 240° azimuth), while a bearing is the direction you travel or face.
👉 On the trail, they’re effectively the same—so don’t overthink it.
Civilian vs Military Compasses (Lensatic)
Civilian hiking compasses (Silva, Suunto, Mountain Warehouse, etc.) are lightweight, transparent, and map-friendly. Military versions tend to be metal-bodied, heavier, and built for rugged fieldwork. They often include mil scales instead of degrees, luminous tritium paint for night work, and a sighting mechanism for ultra-precise azimuths.
| Feature | Civilian (Baseplate) | Military (Lensatic*/Mils) |
|---|---|---|
| Weight | Light (40 – 60 g) | Heavy (> 100 g) |
| Scale | Degrees (0 – 360°) | Mils (0 – 6400) |
| Map Use | Excellent (clear baseplate) | Poor (closed body) |
| Night Use | Glow paint | Tritium illumination |
| Price Range | £15 – £40 | £60 + |
👉 There are military baseplate models available, like the British Army Silva 4/54, that includes both mil scales and degrees, plus tritium illumination. However, whilst some hikers prefer these, they are not common and tend to be more expensive.
💡 For UK hiking you’re better off with the civilian baseplate type — easier to read on an OS map and far cheaper.
Caring for your Compass
A good compass can outlive your boots if you treat it right.
-
Keep it cool: Avoid dashboards or tents in hot sun.
-
Rinse salt and mud: After coastal walks, wash gently in fresh water.
-
Store flat: Stow it in your map case, not your hip pocket.
-
Check bubble size: A small 2-4mm sized bubble’s fine; larger means replace.
-
Magnetic interference: If it ever stops pointing north after contact with strong magnets or speakers, it’s time for a new one.
Summary
Knowing every part of your compass isn’t trivia — it’s the foundation of confidence when hiking. When you understand the baseplate, bezel, orienting lines and all the tiny markings, you move from simply “following arrows” to actually navigating. That deep knowledge turns a simple clear plastic tool into the most reliable, battery-free lifeline you can carry in the British hills.


